
Boston Cream Pie Cupcakes Recipe: A Delectable Twist on a Classic Dessert
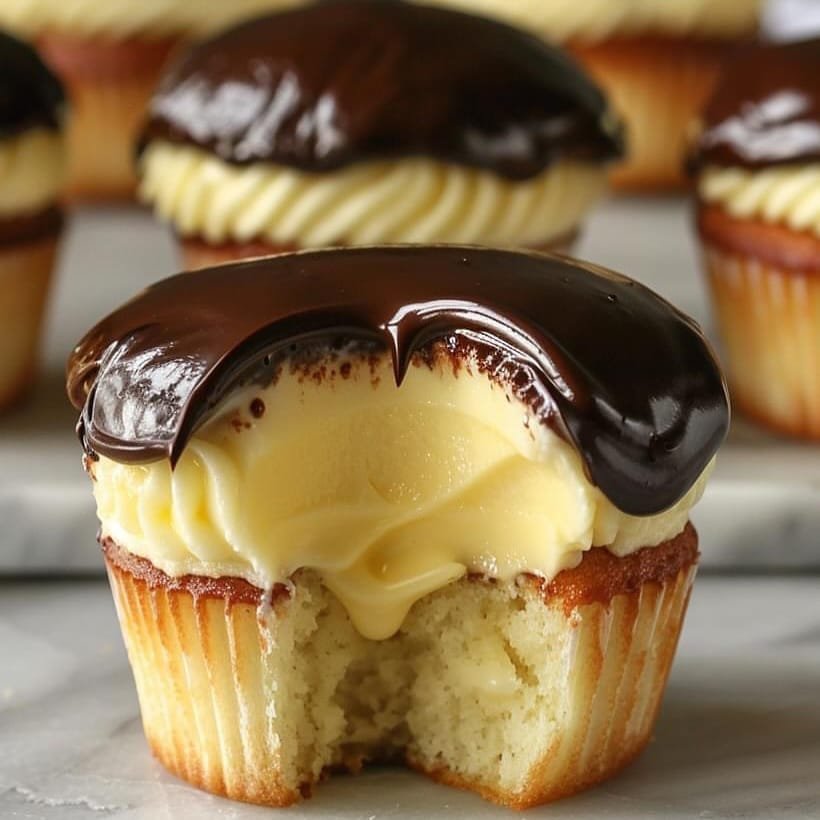
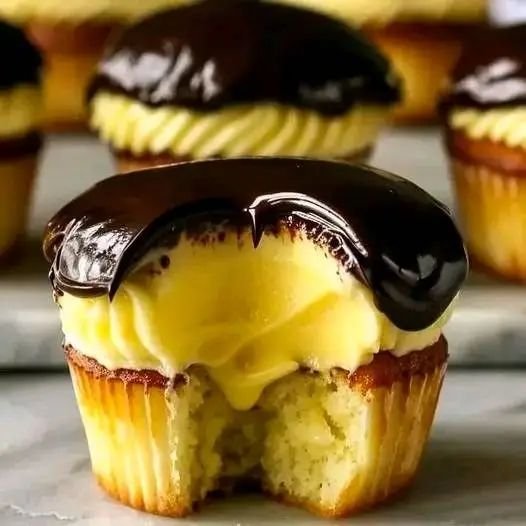
Boston Cream Pie Cupcakes are a delightful twist on the classic Boston Cream Pie, offering the same rich flavors in a convenient, individual-sized treat. These cupcakes combine a moist vanilla cake, a luscious custard filling, and a glossy chocolate glaze, making them perfect for any occasion. Whether you’re planning a special celebration or just want to indulge yourself, these cupcakes are guaranteed to impress!
Part 1: Understanding Boston Cream Pie Cupcakes
When you think of a Boston Cream Pie, you probably picture a rich, creamy cake filled with luscious custard and topped with a silky chocolate glaze. But what if you could enjoy all that goodness in a convenient, bite-sized version? That’s where Boston Cream Pie Cupcakes come in! These cupcakes have all the classic elements, but with the added benefit of being super easy to serve at any event or even as a treat for yourself.
What Are Boston Cream Pie Cupcakes?
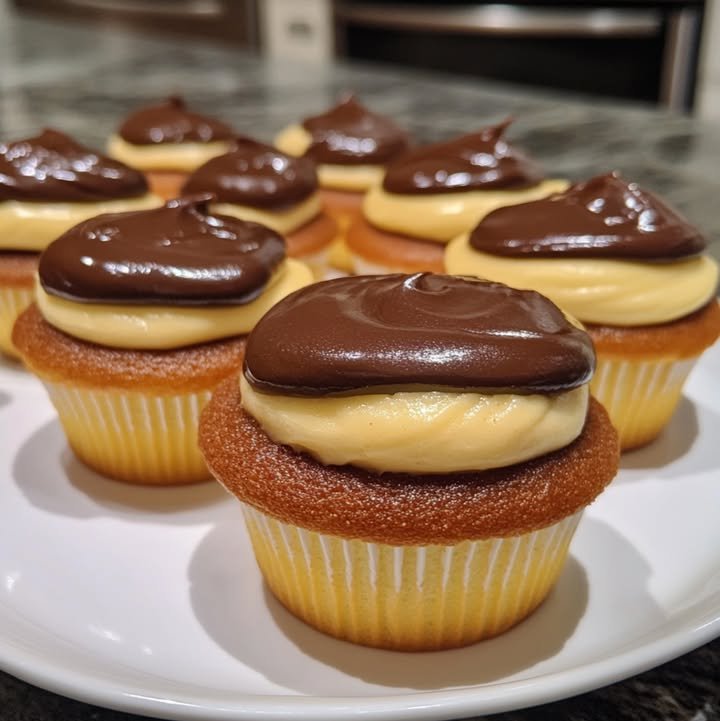
Boston Cream Pie Cupcakes are the miniature version of the classic Boston Cream Pie. They feature a soft, vanilla cake as the base, a creamy custard filling in the middle, and a decadent chocolate glaze on top. The beauty of cupcakes is that they’re the perfect single-serving dessert, so no need to slice up a whole pie! Whether you’re a fan of cakes or pies, this recipe offers the best of both worlds.
These cupcakes have the same tender texture and rich flavor as their pie counterpart, with the added bonus of being easy to transport and serve. Think of them as mini desserts made to satisfy your sweet cravings with a touch of elegance.
The History Behind Boston Cream Pie
The story behind Boston Cream Pie is just as delicious as the dessert itself. Despite the name, it’s actually a cake! Created in the 19th century at the famous Parker House Hotel in Boston, this dessert has become a staple in American baking. It was originally created as a way to showcase a combination of vanilla cake, custard, and chocolate glaze—all of which were luxurious ingredients at the time.
The popularity of Boston Cream Pie grew over the years, and many versions have since emerged, including the ever-popular Boston Cream Pie Cupcakes. With their smaller size, these cupcakes make it easier to enjoy the pie’s delicious flavors without the hassle of slicing or serving large portions. Today, the cupcake version is just as iconic as the original!
Why Choose Cupcakes Over Traditional Pie?
So, why opt for cupcakes instead of the traditional pie? Well, there are a few reasons why cupcakes have become a favorite when it comes to Boston Cream Pie:
- Convenience: Cupcakes are easy to serve, especially when you’re hosting a party or event. No need to cut a cake into slices!
- Portion Control: Each cupcake is a perfectly sized portion, ensuring no one ends up with a giant slice (unless they want to).
- Customization: You can make cupcakes ahead of time, and each one can be decorated just the way you like it.
These mini cupcakes are also ideal for kids’ parties, bake sales, or any event where you want to impress your guests with an elegant yet easy-to-eat dessert. So, if you’re looking for the perfect way to enjoy all the flavors of Boston Cream Pie without the fuss, Boston Cream Pie Cupcakes are your go-to option!
 Part 2: Ingredients and Equipment for Boston Cream Pie Cupcakes
Before diving into the recipe, it’s essential to make sure you have everything you need to create the perfect batch of Boston Cream Pie Cupcakes. The right ingredients and equipment will ensure that your cupcakes turn out light, fluffy, and oh-so-delicious.
Ingredients for the Cupcakes
To make these cupcakes, you’ll need a handful of basic baking ingredients, most of which you likely already have in your pantry. Here’s what you’ll need:
- All-purpose flour: This forms the base of the cupcake and helps create that light, airy texture.
- Granulated sugar: Adds sweetness and helps achieve the perfect crumb.
- Baking powder: Gives the cupcakes that lovely rise.
- Salt: Enhances the flavor of the cake and balances the sweetness.
- Unsalted butter: Creates a moist, tender cake. Be sure to use unsalted butter to have more control over the seasoning.
- Eggs: Acts as the binder in the cake batter, helping to create structure and moisture.
- Vanilla extract: Adds a rich, aromatic flavor that complements the custard and chocolate.
- Whole milk: Provides moisture and creates a soft, tender crumb.
Ingredients for the Custard Filling
The custard filling is what gives Boston Cream Pie its iconic, creamy texture. Here’s what you’ll need for the custard:
- Heavy cream: Creates the rich and creamy base of the custard.
- Whole milk: Balances the cream for a smooth consistency.
- Granulated sugar: Sweetens the custard and helps thicken it.
- Egg yolks: Add richness and help thicken the custard.
- Cornstarch: Helps the custard set, giving it that velvety texture.
- Vanilla extract: Enhances the flavor of the custard and ties everything together.
Ingredients for the Chocolate Glaze
The chocolate glaze is the perfect finishing touch that gives these cupcakes a decadent look and flavor. Here’s what you need for the glaze:
- Semi-sweet chocolate: This is the star ingredient that makes the glaze shiny and rich.
- Heavy cream: Used to melt the chocolate into a smooth, glossy consistency.
- Butter: Adds smoothness and richness to the glaze.
With all these ingredients, you’re well on your way to making a batch of irresistible Boston Cream Pie Cupcakes!
Equipment Needed
Now that we’ve covered the ingredients, let’s talk about the equipment you’ll need. Don’t worry; you don’t need any fancy tools to make these cupcakes! Here’s what you’ll need to get started:
- Cupcake tin: A standard 12-cup muffin tin will work perfectly for baking your cupcakes.
- Cupcake liners: These help keep the cupcakes from sticking to the tin and make cleanup a breeze.
- Mixing bowls: You’ll need a few bowls for mixing the dry and wet ingredients separately.
- Electric mixer: If you have one, it’ll save you time and effort when mixing the batter. However, a hand whisk will work too!
- Measuring spoons and cups: Accurate measurements are key to getting the right texture and flavor.
- Saucepan: You’ll need a small saucepan for making the custard and another for the chocolate glaze.
- Cooling rack: Once the cupcakes are done, let them cool completely on a cooling rack before adding the filling and glaze.
With all your ingredients and equipment lined up, you’re ready to begin the fun part: baking!
Part 3: Step-by-Step Instructions for Making Boston Cream Pie Cupcakes
Now that you’ve gathered all your ingredients and equipment, it’s time to dive into the fun part: baking the Boston Cream Pie Cupcakes! Follow these step-by-step instructions to create a batch of delicious cupcakes that are as beautiful as they are tasty.
Step 1: Preheat the Oven and Prepare the Cupcake Tin
Start by preheating your oven to 350°F (175°C). This ensures the oven is at the perfect temperature for baking the cupcakes.
While the oven heats up, line a 12-cup muffin tin with cupcake liners. These liners not only prevent the cupcakes from sticking, but they also make serving and cleaning up much easier.
Step 2: Prepare the Cupcake Batter
In a medium mixing bowl, whisk together the all-purpose flour, granulated sugar, baking powder, and salt. This is your dry mixture.
Next, in a separate large mixing bowl, cream the unsalted butter using an electric mixer or whisk until it becomes soft and fluffy. This should take about 3 minutes. Add the eggs, one at a time, making sure each egg is fully incorporated before adding the next one. Then, add the vanilla extract.
Gradually add the dry ingredients into the wet mixture, alternating with the whole milk. Start and end with the dry ingredients. Mix until just combined—be careful not to over-mix, as this can lead to dense cupcakes.
Step 3: Fill the Cupcake Tin
Spoon the cupcake batter into the prepared muffin tin, filling each cup about two-thirds full. This allows room for the cupcakes to rise without overflowing.
Step 4: Bake the Cupcakes
Place the filled muffin tin in the preheated oven. Bake the cupcakes for about 18-20 minutes, or until a toothpick inserted into the center of a cupcake comes out clean. Keep an eye on them to avoid over-baking. Once done, remove the tin from the oven and let the cupcakes cool in the tin for about 5 minutes. After that, transfer the cupcakes to a cooling rack to cool completely.
Step 5: Make the Custard Filling
While your cupcakes are cooling, it’s time to make the custard filling. In a small saucepan, combine the whole milk, heavy cream, and granulated sugar. Place it over medium heat and whisk occasionally until the mixture is just about to boil. Don’t let it boil completely!
In a separate bowl, whisk together the egg yolks and cornstarch. Gradually pour a small amount of the hot milk mixture into the egg mixture, whisking constantly to temper the eggs. Once the egg mixture is warmed up, pour it back into the saucepan with the remaining milk mixture.
Continue cooking the custard over medium heat, whisking constantly until it thickens (about 5 minutes). Once thickened, remove from heat and stir in the vanilla extract.
Pour the custard into a bowl, cover with plastic wrap (pressing it directly onto the surface of the custard to prevent a skin from forming), and chill in the refrigerator for at least 1 hour to set.
Step 6: Make the Chocolate Glaze
While the custard is chilling, it’s time to make the chocolate glaze. In a small saucepan, heat the heavy cream over medium heat until it’s warm, but not boiling. Remove from the heat and add the semi-sweet chocolate. Stir until the chocolate is completely melted and the mixture is smooth. Add the butter and continue stirring until it’s fully incorporated.
Let the chocolate glaze cool for a few minutes to thicken slightly. This will give you a shiny, smooth glaze that’s perfect for drizzling over your cupcakes.
Step 7: Assemble the Boston Cream Pie Cupcakes
Once your cupcakes have cooled completely, it’s time to assemble them! Using a small spoon or a melon baller, carefully hollow out the center of each cupcake. Be gentle to leave enough cake around the edges to hold the filling.
Spoon the chilled custard filling into the hollowed-out centers of each cupcake. Fill them generously, but not so much that it spills over.
After filling the cupcakes, drizzle the chocolate glaze over the top of each cupcake. You can either spoon it over or use a piping bag for a more decorative look.
Let the glaze set for a few minutes before serving, and enjoy your delicious homemade Boston Cream Pie Cupcakes
 Part 4: Frequently Asked Questions About Boston Cream Pie Cupcakes
 Part 4: Frequently Asked Questions About Boston Cream Pie Cupcakes
Now that you’ve successfully baked your Boston Cream Pie Cupcakes, you may have a few lingering questions. Here, we’ll cover some of the most common FAQs about this dessert to ensure your cupcakes turn out perfectly every time.
1. Can I make the custard filling ahead of time?
Yes! In fact, making the custard filling ahead of time is highly recommended. You can prepare the custard the night before and store it in an airtight container in the refrigerator. Just make sure to press plastic wrap directly onto the surface of the custard to prevent it from forming a skin. This will save you time on the day you bake the cupcakes, and the custard will have plenty of time to chill and set.
2. Can I use store-bought custard for this recipe?
While making homemade custard adds that extra touch of richness and flavor to your Boston Cream Pie Cupcakes, you can absolutely use store-bought custard if you’re short on time. Just ensure it’s a thick, high-quality custard for the best results. Keep in mind that homemade custard tends to have a fresher, more flavorful taste, so if you can, we recommend making it from scratch.
3. How do I store leftover cupcakes?
Leftover Boston Cream Pie Cupcakes should be stored in an airtight container in the refrigerator due to the custard filling. The cold will help keep the custard fresh. They should last for about 3-4 days. Just be sure to enjoy them sooner rather than later for the best taste and texture.
4. Can I freeze these cupcakes?
Yes, you can freeze Boston Cream Pie Cupcakes, but you’ll want to freeze them without the chocolate glaze. The glaze can become a bit messy after freezing and thawing. Here’s how you can freeze the cupcakes:
- After baking and cooling, hollow out the cupcakes and fill them with the custard.
- Place the cupcakes on a baking sheet, uncovered, and freeze for 1-2 hours.
- Once frozen, transfer the cupcakes to an airtight container or freezer bag. They can be stored for up to 1 month.
- When you’re ready to eat them, let the cupcakes thaw in the refrigerator overnight, then top with the chocolate glaze just before serving.
5. How can I make the chocolate glaze thicker?
If you find that the chocolate glaze is too thin, you can thicken it by either letting it cool for a longer period or adding more chocolate. For a thicker glaze, increase the amount of chocolate used in the recipe, or let the glaze sit for a few minutes to set. If the glaze cools too much and becomes too thick to pour, simply reheat it gently over low heat until it reaches the desired consistency.
6. Can I use a different frosting or glaze?
If you’re looking for a twist on the classic Boston Cream Pie Cupcakes, you can definitely swap the chocolate glaze for another type of frosting or glaze. For example, you could try a vanilla glaze or a whipped cream topping. Keep in mind that this will change the flavor profile of the cupcakes, but it can still be delicious! Just make sure whatever frosting or glaze you choose complements the custard filling.
Part 5: Variations of Boston Cream Pie Cupcakes
While the classic Boston Cream Pie Cupcakes recipe is absolutely delicious on its own, it’s always fun to mix things up and try a few variations. Whether you want to adjust the flavors, make them more festive, or add a unique twist, here are some ideas for you to experiment with.
1. Mini Boston Cream Pies
If you prefer a more elegant, bite-sized treat, try making mini Boston Cream Pies instead of cupcakes. To create these, use mini muffin tins to bake small sponge cakes. Hollow out the center and fill them with custard just like the original recipe. The chocolate glaze can be poured over the top in a neat drizzle. These mini treats are perfect for parties, baby showers, or any event where you want to impress your guests with something cute and delicious!
2. Adding Fruit to the Custard Filling
Why not give the custard a fruity twist? Berries like raspberries or strawberries can add a lovely tang and vibrant color. Puree some fresh fruit and swirl it into the custard filling for a natural, sweet kick. You can also fold in chopped bananas or peaches for an extra layer of flavor. This variation will make your Boston Cream Pie Cupcakes feel a little more seasonal and refreshing, especially during warmer months.
3. Vegan Boston Cream Pie Cupcakes
For a vegan version of Boston Cream Pie Cupcakes, there are a few key swaps you can make. Use plant-based milk such as almond or coconut milk instead of dairy. For the custard, make a vegan custard by using cornstarch, coconut milk, and a touch of vanilla for flavor. As for the cupcake base, substitute the eggs with flax eggs or applesauce and use a plant-based butter for a fluffy texture. Top it off with dairy-free chocolate for the glaze. These cupcakes are just as decadent and satisfying without the dairy!
4. Gluten-Free Boston Cream Pie Cupcakes
Making gluten-free Boston Cream Pie Cupcakes is easier than you might think! Simply replace the all-purpose flour with a gluten-free flour blend. Make sure the blend you choose is suitable for baking, as some are better for cakes than others. You may also need to add xanthan gum or guar gum to help bind the ingredients and improve texture. The custard filling and chocolate glaze can remain the same, as they’re already naturally gluten-free. With these small adjustments, you can still enjoy the same delicious flavors with no gluten.
5. Chocolate Cupcakes Instead of Vanilla )
If you love chocolate, why not make the base of your Boston Cream Pie Cupcakes a little richer by using chocolate cupcakes instead of the classic vanilla? You can easily swap the vanilla extract for cocoa powder or use a pre-made chocolate cupcake mix. The combination of the deep chocolate cake with the creamy custard and glossy chocolate glaze makes for an irresistible dessert. This variation is perfect for chocolate lovers and adds a new level of indulgence to your cupcakes.
6. Boston Cream Pie Cupcakes with a Nutty Twist
For a bit of crunch and texture, try adding chopped nuts to the cupcakes. Toasted almonds, hazelnuts, or pecans can be sprinkled on top of the chocolate glaze, creating a beautiful contrast of flavors and textures. You can also incorporate crushed nuts into the cupcake batter itself for an added crunch in every bite. Just make sure the nuts are finely chopped to avoid overwhelming the delicate texture of the cupcakes.
Part 6: Tips and Tricks for Perfect Boston Cream Pie Cupcakes
Achieving perfect Boston Cream Pie Cupcakes takes a bit of practice, but with the right techniques and a few helpful tips, you’ll become a pro in no time. Whether you’re making them for the first time or just want to improve your skills, these tips will ensure your cupcakes turn out wonderfully every time.
1. Make Sure Your Ingredients Are at Room Temperature
One of the simplest yet most effective tips for baking cupcakes is to use ingredients that are at room temperature. This includes eggs, butter, and milk. When ingredients like butter and eggs are too cold, they won’t mix as easily, leading to uneven batter and a denser texture. Allow these ingredients to sit out for about 30 minutes before you start baking. Trust me, this small step can make a big difference in achieving the light, airy texture of your cupcakes.
2. Properly Measure Your Flour
How you measure flour can make or break the texture of your cupcakes. If you scoop the flour directly from the bag with your measuring cup, you may end up with too much flour, leading to a dry cupcake. Instead, sift your flour and then use the spoon-and-level method. Spoon the flour into the measuring cup and level it off with a knife. This ensures you’re using the correct amount of flour for a tender, moist cupcake.
3. Don’t Overmix the Batter
Overmixing your cupcake batter is a common mistake that can lead to tough cupcakes. When you mix the batter too much, the gluten in the flour develops, making the cupcakes dense and chewy rather than light and fluffy. Mix the ingredients just until they are combined. A few lumps are perfectly fine! Be sure to fold in the dry ingredients gently to avoid overworking the batter.
4. Filling the Cupcake Liners
Filling your cupcake liners to the right level is key for achieving evenly baked cupcakes. Aim to fill each liner about 2/3 full. If you fill them too much, the cupcakes will overflow and form an unattractive dome. If you don’t fill them enough, they will turn out too small and not have the right texture. Use an ice cream scoop for consistent portions and to avoid making a mess.
5. Perfecting the Custard Filling
The custard filling is what makes Boston Cream Pie Cupcakes stand out, but it can be tricky to get it just right. To achieve a smooth and silky custard, make sure to constantly whisk the mixture as it cooks. This will prevent it from curdling or becoming lumpy. Once the custard is thickened, remove it from the heat and let it cool before filling the cupcakes. If the custard is too runny, it will spill out of the cupcakes; if it’s too thick, it will be difficult to pipe in.
6. The Chocolate Glaze
To make the perfect chocolate glaze for your Boston Cream Pie Cupcakes, use high-quality chocolate for the best flavor and texture. Melt the chocolate slowly over low heat or using a double boiler to prevent it from seizing up. Once melted, allow it to cool slightly before pouring it over the cupcakes. This will help the glaze set more evenly without being too runny. For a shiny finish, let the glaze sit for a few minutes before drizzling it over the cupcakes.
7. Let the Cupcakes Cool Completely Before Assembling
It can be tempting to assemble your cupcakes as soon as they’re out of the oven, but it’s crucial to let the cupcakes cool completely before you begin filling and glazing them. If you attempt to fill warm cupcakes, the custard may melt and make a mess. Additionally, the chocolate glaze will not set properly on a warm surface. Allow the cupcakes to cool for at least 30 minutes before starting the filling and glazing process.
8. Pipe the Custard for Neatness
When filling your cupcakes with the custard, it’s best to use a piping bag with a round tip. This ensures a neat and even filling. If you don’t have a piping bag, you can use a plastic sandwich bag with the tip of one corner snipped off. Simply insert the piping bag into the center of the cooled cupcake and squeeze gently until the custard starts to fill up the center. Avoid overfilling, as this can cause the custard to spill out when you top the cupcake with the chocolate glaze.
 Part 7: FAQs About Boston Cream Pie Cupcakes
 Part 7: FAQs About Boston Cream Pie Cupcakes
To wrap things up, let’s address some of the most common questions people have when making Boston Cream Pie Cupcakes. These FAQs will help clarify any lingering doubts and make sure you have all the info you need to succeed in the kitchen.
1. Can I Use a Different Filling Instead of Custard?
While the classic Boston Cream Pie Cupcakes recipe calls for a smooth and creamy custard filling, you can certainly experiment with different fillings if you prefer. Some bakers use vanilla pudding as a substitute, while others opt for a whipped cream filling for a lighter texture. Just make sure your chosen filling is thick enough so it doesn’t ooze out when the cupcakes are cut or bitten into.
2. How Do I Store Leftover Cupcakes?
If you happen to have any Boston Cream Pie Cupcakes left over (though that’s unlikely!), store them in an airtight container. Place them in the refrigerator because of the custard filling. The cupcakes will stay fresh for 2-3 days. For longer storage, you can freeze the cupcakes before glazing. Just make sure to let them cool completely before wrapping them tightly in plastic wrap and freezing them for up to 1 month. When ready to eat, simply thaw them and top with the chocolate glaze.
3. Can I Make These Cupcakes Ahead of Time?
Yes, you can make Boston Cream Pie Cupcakes ahead of time! For the best results, you can bake the cupcakes and prepare the custard filling the day before you plan to serve them. Store the cupcakes and custard separately in airtight containers in the refrigerator. Just before serving, fill the cupcakes with custard and top them with the chocolate glaze. This will allow the cupcakes to maintain their freshness while saving you time on the big day.
4. Can I Make These Cupcakes Gluten-Free?
If you need a gluten-free version of Boston Cream Pie Cupcakes, you can easily swap the all-purpose flour for a gluten-free flour blend. Be sure to choose a high-quality blend that’s designed for baking, as this will provide the best texture and structure for your cupcakes. Additionally, you can make sure that the chocolate glaze and custard are gluten-free by checking the labels of any pre-made products you use.
5. How Do I Prevent the Cupcakes from Getting Too Dry?
If you find that your Boston Cream Pie Cupcakes are too dry, there are a couple of things you can do to prevent this. First, avoid overbaking the cupcakes. Test them by gently pressing on the top – it should spring back, not feel hard. Second, ensure your batter isn’t overmixed, as this can result in dense, dry cupcakes. Lastly, be sure to use the proper amount of liquid in your batter, as well as a moist custard filling, to keep them nice and tender.
6. Can I Make a Vegan Version of Boston Cream Pie Cupcakes?
Yes, you can make a vegan version of Boston Cream Pie Cupcakes! To replace the eggs in the cupcake batter, you can use flax eggs (1 tablespoon of ground flaxseed mixed with 3 tablespoons of water, left to sit for 5 minutes), or you can use an egg replacer. Swap the dairy milk with a plant-based milk such as almond or soy, and use vegan butter in the batter and glaze. For the custard, opt for a dairy-free custard powder or create your own using coconut milk as a base.
7. How Can I Make My Chocolate Glaze Shiny?
For a glossy and smooth finish on your chocolate glaze, the key is to use the right technique. Once you’ve melted the chocolate, add a small amount of vegetable oil or corn syrup to give the glaze an extra shiny finish. Allow the glaze to cool slightly before pouring it over the cupcakes. If it’s too hot, it will melt the custard, and if it’s too cool, it will become too thick and hard to work with.
8. Can I Add Flavors to the Custard or Glaze?
Absolutely! While the classic Boston Cream Pie Cupcakes are known for their simple vanilla custard and chocolate glaze, feel free to experiment with different flavors. For the custard, you could add a splash of almond extract or coffee for a unique twist. As for the glaze, you could incorporate a hint of orange zest or hazelnut flavor to make the cupcakes your own. Just make sure the additional flavors complement the vanilla and chocolate base.
Conclusion:
In conclusion, making Boston Cream Pie Cupcakes is a delightful way to enjoy the classic flavors of Boston cream pie in a more portable, cupcake-sized treat. By following the recipe’s simple steps, you can create a dessert that is rich, creamy, and bursting with flavor. Whether you’re serving them for a special occasion or simply enjoying them with a cup of coffee, these cupcakes are sure to impress.
With their light vanilla cake base, creamy custard filling, and decadent chocolate glaze, Boston Cream Pie Cupcakes offer the perfect balance of sweetness and richness. Not only are they visually appealing, but they also bring together the best elements of a classic dessert in a fun and modern way.
Remember, baking is all about creativity and having fun in the kitchen. So don’t hesitate to add your twist, whether that’s adjusting the flavors or trying a different frosting. Enjoy every step, and most importantly, enjoy every bite!
Print
Boston Cream Pie Cupcakes Recipe: A Delectable Twist on a Classic Dessert
Ingredients
Instructions
Notes
- Author: laura